Agelong Tree 5 Help
User Tools
General info
Data manipulation
Family tree
Reports
Files manipulations
Licensing
Extra
Table of Contents
Tree options
On the main Tree tab there is Tree options button.
All tree options are organized in groups on the following tabs: Content, Apearance and Persons in the tree options window.
Contents of the tree
On the Contents tab you can choose the type of relatives that you want in the tree.

For example, Only direct relatives allows only direct ancestors and direct descendants of the tree root. The root of the tree can be changed: select another person in the Persons table or in the tree and build a new tree.
When building a tree only on the male line, no descendants of the women are displayed in the tree. Similarly, when building a tree only on the female line, no descendants of men are displayed in the tree.
If the Spouses option is ticked, in the direct relatives tree you will also see the spouses of your children and other spouses of your ancestors (although they are not your direct relatives). Same about the blood relatives tree: if the Spouses is ticked, you will see all wives and husbands of your blood relatives although those are not your blood relatives.
If you do not want to see any ex-spouses, tick the option Do not show ex-spouses.
You can also choose how to see the adopted children and adoptive parents in the tree. If you choose No adopted children, no adopted children are shown in the tree. If you choose Adopted children as blood ones, you will see the descendants of the adopted children in your blood relatives tree.
Same about the adoptive parents. If you choose Adoptive parents as blood ones, in your blood relatives tree you will see all blood relatives of the adoptive parents.
You can use the active filters of the Persons table in the tree: tick the option Apply active filters of Persons table in the tree. The tree will include only the persons who correspond to the active filters of the Persons table. If Break at filtered out persons is active, the branch of the tree is stopped at the person that does not satisfy the filter condition. If the option is off, the person that does not satisfy the filter condition is shown as a blank square and the branch of the tree continues.
Title is shown above the tree in the chosen font, and Caption under the tree is shown under the tree, by default the captions font is smaller than title font, you can change the font at Appearance tab.
If you tick Statistics and Generations statistics, you will see the family tree statistics under the tree and statistics for each generation on the left from the tree.
If you want to build a family tree on a separate tab, tick Each tree on separate tab. It can be helpful when you want to compare the two different tree views (with different options, for example, or different backgrounds).
Auto rebuild means that the changes are shown immediately if they are made in the tree.
Family tree appearance
Appearance tab contains options to design your family tree chart appearance. The combination of family tree chart appearance settings and of tree nodes contents is called a tree style. To save your tree style or to download a tree style (standart, compact, supercompact or your own saved one) click the Load style or Save style buttons over the example tree which shows the current style design.
In the left upper corner there is a drop-down list where you can choose the direction of branches in the family tree. Descendants can be at the top, at the bottom (vertical family tree), on the left or on the right (horizontal family chart):

When the option Optimize spouses position is ticked, the spouses are located one above the other if it is possible.
When the option Mark the deceased is ticked, a black ribbon mark is placed in the top left corner of the nodes of deceased persons.
In complex trees, some branches can not be displayed around the person from which they begin. In these cases, the person and the corresponding branch are transferred left or right from the original location. If the option Bring the branches to the nearest side is on, then the direction of branches relocation is determined by the distance: the branch is carried to the closer edge of the tree. If this option is disabled, then the branches of the persons belonging to the father's subtree are taken to the left, and the branches of the persons belonging to the mother's subtree are taken to the right.
Distances between nodes of one branch, between branches and between generations, and also line thickness are indicated in pixels.
The lines in the tree can be one-color or multi-colored, in the latter case the program automatically sets the colors of the lines so that the neighboring parallel lines are of different colors, this improves the readability of the tree.
A tree can have No background, Two-color background (two background colors, for even and odd generations) or Background image.
Follow the instructions on the screenshot to set an image as a background for family tree

You can set Title font of the tree and Captions font (the captions under the tree, statistics).
The root of the tree (i.g. the person whose tree is built) is coloured differently when Highlight root node option is turned on.
Persons in the family tree chart
This tab provides configuration of family tree chart nodes. In the upper left corner there is a drop-down list that allows you to determine which type of nodes the settings apply to: all tree people, blood relatives of the tree root, to direct relatives of the tree root, to the parents and children of the root or to the root itself:

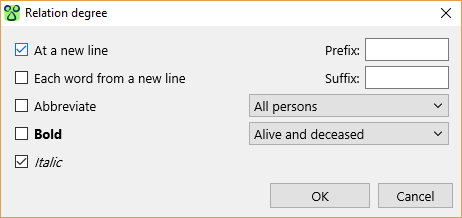
On the Data fields tab, you can change the list of data fields displayed in the tree chart node. For each field, you can set a word wrap, a bold or italic font, a prefix and a field suffix (for example, parentheses for life dates), and for which persons this field will be displayed: men or women, living or dead:
“ID” field shows the person's id number given by the program.
For the fields Relation degree, Marriages and Comment there is an option Abbreviate, it allows to display a short value in this field.
On the Graphics tab there are settings for the size and color of the tree node, the color and the thickness of the frame of the node:

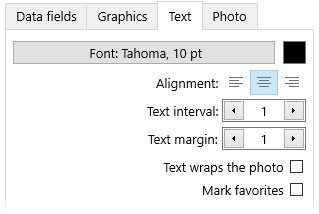
On the Text tab you can choose a font, alignment, text interval, text margin, set the text wrap around the photo, enable selection of favourites in bold:
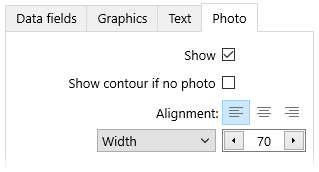
On the Photos tab, you can find settings of the photo displayed in the tree node. You can set the alignment and size of the photo, turn on the frame display if there is no photo: